The 4.7 earthquake definitely disturbed my sleep last night, so it’s nice to have a Cuzen Matcha shot and some Harney & Sons Paris tea to wake up and get me through the day.
Speaking of spilling tea, I had a great conversation with Joubin Mirzadegan of the storied VC firm Kleiner Perkins where we got to chat about the hero’s journey of entrepreneurship, my earliest “Hot Nacho” WordPress scandal and the context of current battles, 996 work, jazz clubs in San Francisco, and more. Kleiner never invested in Automattic (I don’t think we ever pitched) but I have always had huge respect for John Doerr, Brook Byers, Bing Gordon, Mary Meeker, Ilya Fushman, and Mamoon Hamid, so many of the people at KPCB. You can watch on YouTube or listen in Pocket Casts.
After building websites for several local nonprofits, I noticed a common, costly problem. These groups were doing incredible work, but their simple donation forms only worked for local supporters. This was turning away passionate donors from other countries.
Unfortunately, this small oversight can result in organizations missing thousands of dollars in donations. When someone from another country wants to contribute, a failed payment method can block their generosity.
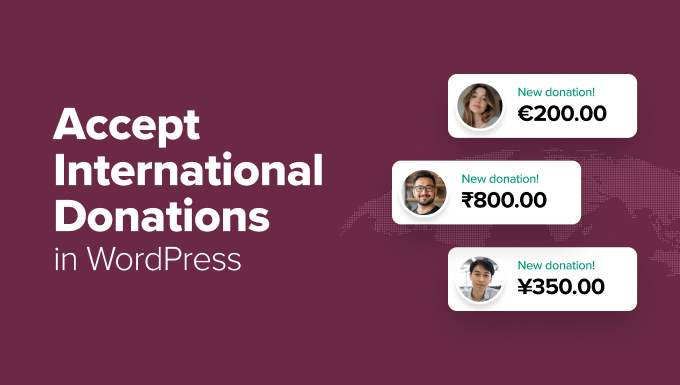
I’ve seen how frustrating this is for both the nonprofit and the supporter. That’s why I put together this guide to show you how to accept international donations in WordPress the right way.
I’ll cover the exact plugins I use for clients, the key payment settings you need, and how to make it easy for anyone in the world to support your cause.
In a Rush? Key Takeaways to Accept International Donations
The best way to accept international donations in WordPress is by using a dedicated fundraising plugin like WP Charitable for full campaigns or a streamlined payment plugin like WP Simple Pay for dedicated Stripe donation forms.
Both tools integrate with payment gateways like Stripe or PayPal, which automatically handle currency conversions from over 135 countries.
You can use these handy links to quickly navigate through the article:
Accepting international donations through WordPress opens up a world of fundraising opportunities that many nonprofits miss out on. When you expand beyond local supporters, you’re tapping into a global community of people who may feel deeply connected to your cause.
The benefits of going global with your donation strategy are significant:
Instead of limiting yourself to local supporters, you can reach millions of potential donors worldwide who share your mission and values.
While local donors may give during specific holidays or events, international supporters operate on different calendars and cultural giving traditions.
Reaching donors all over the world means you’re less affected by local economic conditions or regional challenges.
Many causes benefit significantly from supporters who have moved abroad but still care deeply about issues in their home country or region.
I’ve seen nonprofits double their monthly donations simply by making their forms accessible to international supporters. The key is having the right setup to handle different currencies, payment methods, and legal requirements seamlessly.
Why You Need to Plan Your International Donations Page
Before we jump into the plugins, it’s worth taking a moment to think about the donor’s experience. I’ve seen firsthand how a poorly planned donation page can turn away potential supporters just as quickly as a broken payment button.
A little planning goes a long way. Keeping these points in mind will help you avoid common challenges and create a donation process that feels welcoming to everyone, everywhere.
1. Choose the Right Payment Gateways
The first thing I always check is which payment methods are popular in the regions you want to reach. While many people use credit cards, options like PayPal are dominant in some countries, while direct bank transfers are preferred in others.
For this reason, I almost always recommend setting up both Stripe and PayPal. Together, they cover most of the world’s preferred payment methods and automatically handle many of the currency conversions for you.
This gives your donors a choice and makes them more likely to complete the donation.
2. Display Currency and Language Clearly
Imagine wanting to donate $20 but seeing a symbol you don’t recognize, like ¥ or £. You might hesitate, unsure of the actual cost.
The best way to prevent this confusion is to clearly state the currency you accept (for example, ‘All donations are in USD’). This is the most straightforward approach and the one I’ll cover in this guide.
With the tools I recommend, you will set a single currency on your form. When an international donor pays, your payment gateway (like Stripe or PayPal) handles the currency exchange automatically.
Think of it like this: your donation form shows a $20 price tag, and when someone from Germany donates, their bank is charged in Euros for the equivalent amount. You still receive $20. It’s the simplest and most reliable way to start.
Similarly, language can be a barrier. If you expect a high volume of donations from a specific non-English speaking region, then it’s a good idea to translate your donation page.
I’ve used plugins like WPML to create multilingual websites for clients, and it makes a huge difference in building trust with a global audience.
3. Think About Legal & Tax Compliance
Here’s something important to remember: rules for charitable donations are different in every country. Your WordPress plugin can send a receipt right away, but that doesn’t guarantee it can be used for a tax deduction in the donor’s country.
This is one area where I never guess. I always recommend talking to a legal or tax professional to understand the rules for the countries you want to receive donations from.
A simple disclaimer on your donation page, like ‘Please consult a local tax professional regarding donation deductibility,’ can also be very helpful.
For example, you could add a clear statement like: “As a [Your Country]-based organization, your contribution is tax-deductible to the extent allowed by [Your Country]’s law. Please consult with a tax professional in your own country for information on tax deductibility.”
Method 1: Use Charitable for All-in-One Fundraising Campaigns
For nonprofits that want to run full fundraising campaigns, Charitable is my go-to solution. It’s more than just a donation form. It lets you set goals, show progress bars, and manage your donors all in one place.
I recommend this method if you plan to run multiple campaigns throughout the year and need a powerful tool to track your fundraising success. It connects with both Stripe and PayPal, making international payments easy to handle.
But to connect to payment gateways like Stripe and PayPal, you will need one of Charitable’s paid plans. For this tutorial, the Plus plan has everything you need. You’ll need to sign up for an account on their website to purchase the plan and download the plugin files.
You can learn about my experiences using the plugin in my Charitable review.
Step 1: Install and Activate Charitable
First, you’ll need to install and activate the Charitable plugin. If you need help, then you can follow our step-by-step guide on how to install a WordPress plugin.
Once it’s activated, you will see a new ‘Charitable’ menu item in your WordPress admin sidebar.
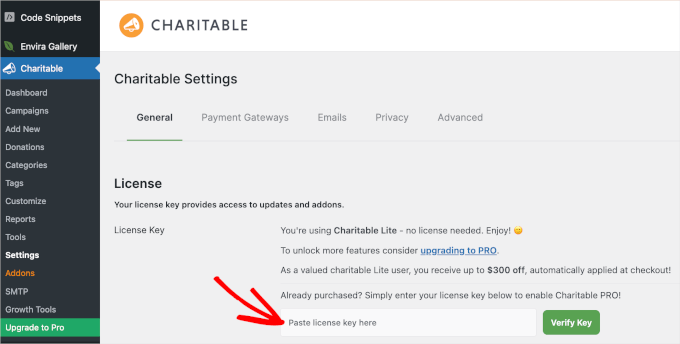
You need to navigate to Charitable » Settings and enter your license key.
You can find this in the email you received when you purchased your Charitable plan, and in the account area on the Charitable website.
After entering your license key, simply click the ‘Verify Key’ button to connect your website to your Charitable account.
Step 2: Connect Your Payment Gateway
Before you can accept any donations, you will need to connect a payment processor. For international donations, Stripe is an excellent choice because it handles over 135 currencies automatically.
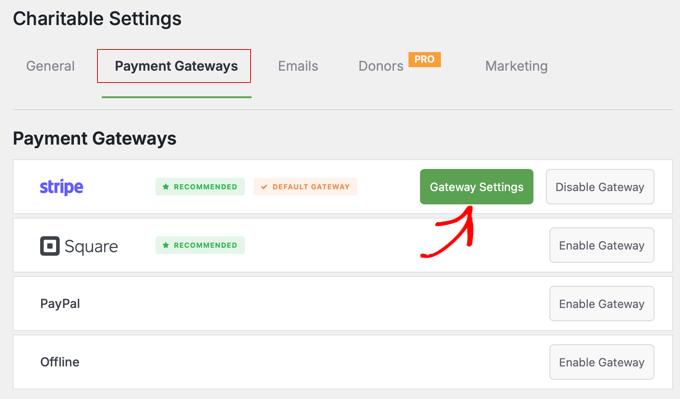
While you are still on the Charitable » Settings page, click on the ‘Payment Gateways’ tab. You will see several available gateways, with Stripe enabled by default. To connect your account, click the ‘Gateway Settings’ button next to Stripe.
Next, click the ‘Gateway Settings’ button.
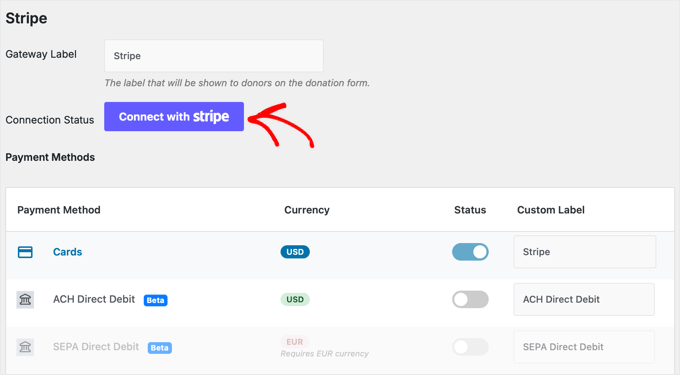
Here, you’ll connect your Stripe account by clicking the ‘Connect with Stripe’ button and following the on-screen instructions.
Notice that the credit card payment type has already been activated. If you would like to activate any of the other payment types, such as direct debit, then you can do that now by switching the Status toggle to the On position.
You should also scroll down to the bottom of the page and make sure you are happy with the other settings, and then click the ‘Save Changes’ button.
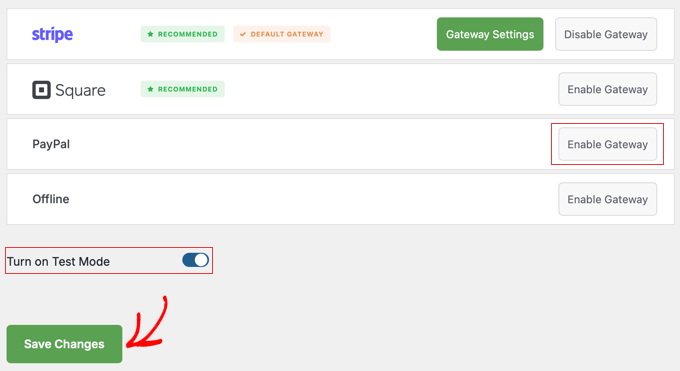
Once you have finished setting up Stripe, you can return to the Payment Gateways page and enable PayPal and any other gateways you need.
Make sure you click the ‘Save Changes’ button at the bottom of the page when you have finished.
Before you finish, I highly recommend using Test Mode. This super helpful feature lets you run a complete test donation using fake credit card details to make sure your form and payment gateway are working perfectly.
Just don’t make the same mistake a client of mine once did. We spent an hour wondering why real donations weren’t processing, only to realize the campaign was still in ‘Test Mode’. Always double-check that you’ve disabled this setting before you share your campaign with the world.
In time, you may wish to add additional payment integrations. You can view the available options by navigating to the Downloads page in your account area on the Charitable website.
For example, GoCardless offers card-free payments via bank transfers and direct debit in over 30 countries.
You can install these additional integrations as plugins, just as you installed the WP Charitable plugin earlier. They will then automatically appear in the list of available payment gateways.
Step 3: Create and Customize Your First Campaign
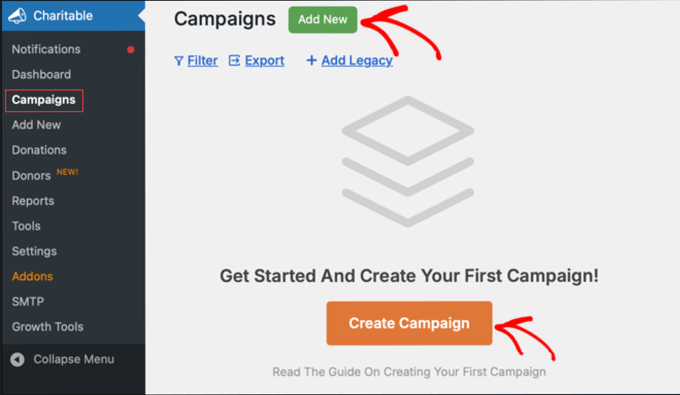
You’re now ready to create a campaign. From your WordPress dashboard, navigate to Charitable » Campaigns and click the ‘Add New’ button.
If you haven’t created a campaign before, then you will also see a ‘Create Campaign’ button that does the same thing.
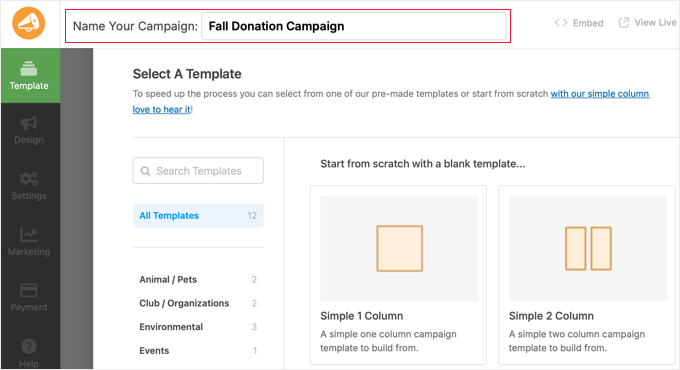
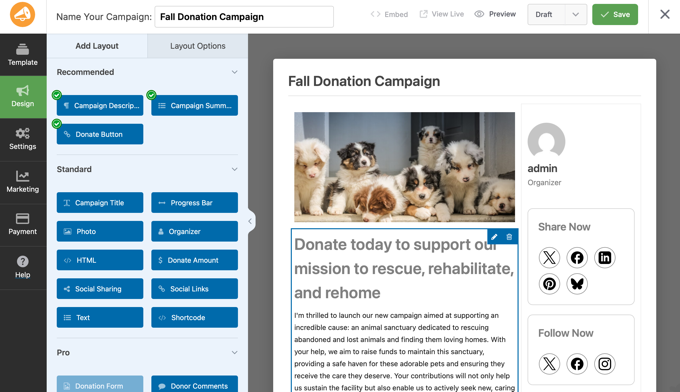
First, give your campaign a clear and compelling title, just like you would for a blog post.
This is your chance to tell a story and connect with potential donors.
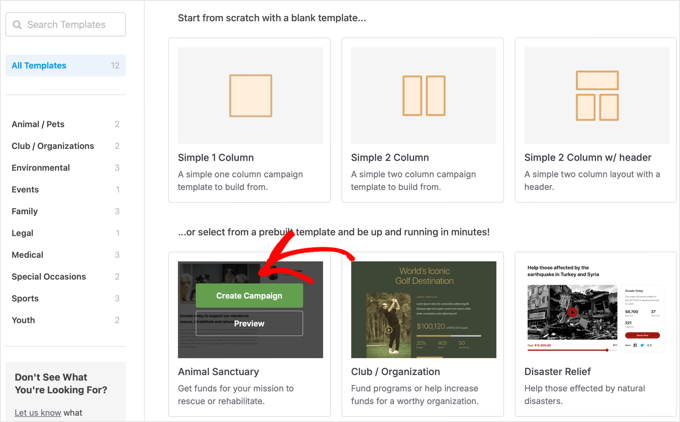
Next, you will need to select a template. There are plenty of options, including blank campaigns and ready-made templates that may match the look you are after.
Simply hover your mouse over the template you wish to use and then click the ‘Create Campaign’ button.
Next, you can change the design of your campaign.
You’ll likely need to customize the text, swap out images, and add more blocks to the page.
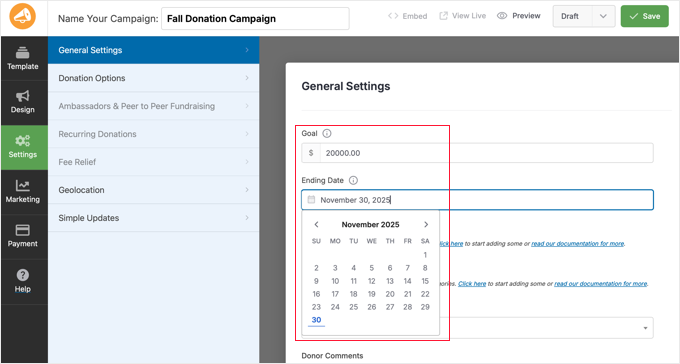
Next, click on the Settings tab on the left of the screen. On the General Settings page, you will find some key settings to fill out.
You can set a fundraising goal (for example, $20,000) that can motivate donors by showing them how their contribution helps reach a target. You can also set an end date for time-sensitive campaigns.
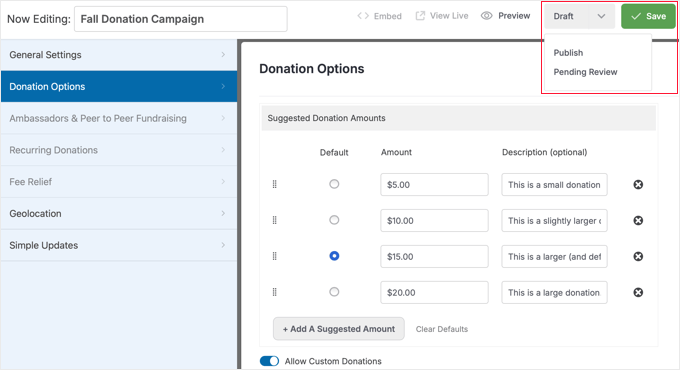
Next, click on the Donation options page.
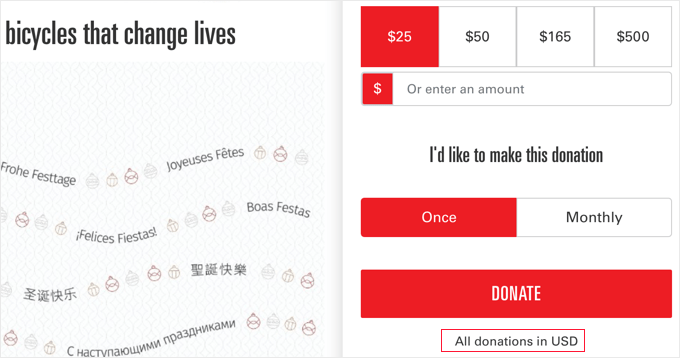
Here, you can suggest donation amounts to guide your donors, such as $25, $50, $100. At the bottom of the page, you will notice that the ‘Custom Amounts’ setting is enabled by default, so people can give whatever they choose.
Once you’ve configured these settings, switch the campaign from ‘Draft’ to ‘Publish’ using the drop-down menu and then click the ‘Save’ button.
Step 4: Optimizing for International Donors
To make your campaign welcoming to a global audience, there are two key things to consider: currency and language.
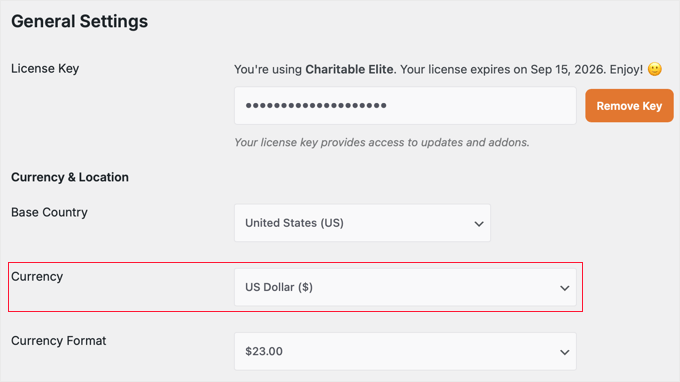
First, let’s set your currency. Go to Charitable » Settings » General and choose your desired currency (such as USD, EUR, AUD) from the dropdown menu. This will be the currency displayed on all your campaign forms.
While you can only display one currency on the form, your payment gateway will automatically handle conversions for international donors.
For example, if you set your currency to USD, a donor from the UK can still pay with their GBP credit card. This is the most straightforward and simplest way to handle international payments.
If you expect many donors from a specific region, then translating your campaign page can significantly increase donations.
The easiest way to do this is with a translation plugin like TranslatePress. It’s one of the best on the market because it lets you translate everything from the front-end of your site, and it is fully compatible with Charitable.
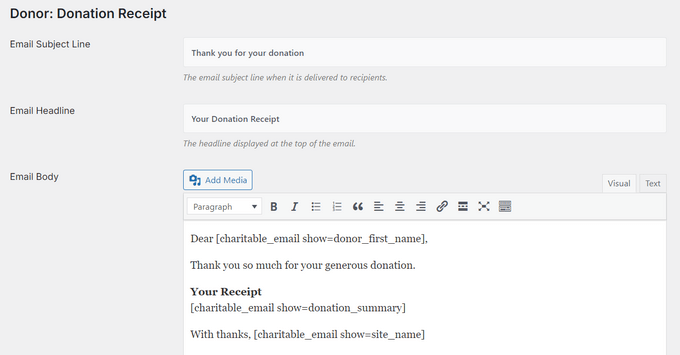
A professional, clear donation receipt is essential, especially for international donors who may need it for tax purposes. Charitable makes it easy to customize these emails.
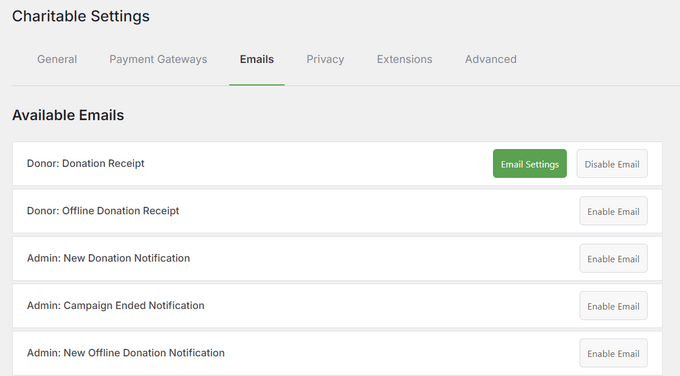
Navigate to Charitable » Settings » Emails. Here, you can customize various automated emails, including the ‘Donation Receipt’ and ‘Campaign Ended’ notifications.
You can add your logo, modify the subject and body text, and include any specific information your nonprofit needs to provide.
For an international audience, it’s a great idea to add a note that includes your organization’s registration or charity number for their records.
Step 6: Share Your Campaign with the World
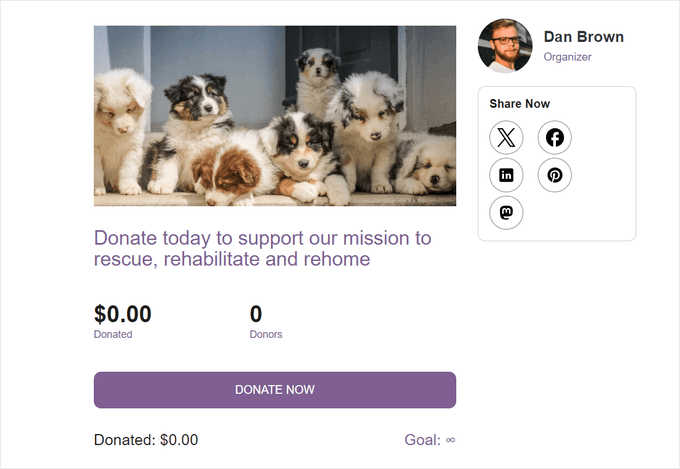
The great news is that when you published your campaign, Charitable already did the heavy lifting and automatically created a dedicated page for it on your website.
You can find it by clicking the ‘View Campaign’ link on the campaign editor page. This page is live and ready to be shared with your audience. You can post the link on social media, add it to your email newsletter, or include it in a web push notification.
Optional: Add Your Campaign to Other Pages
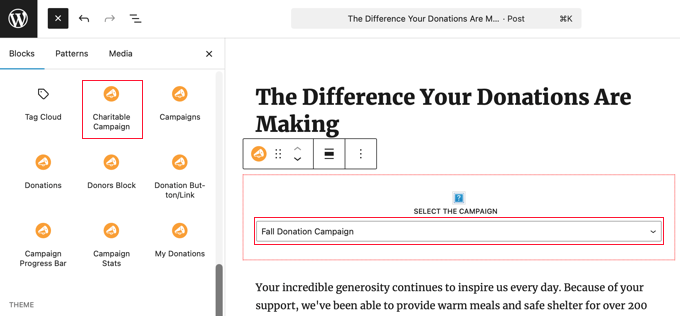
You can also add the donation form to any other page, post, or widget area. This gives you complete control over where the form appears on your website, like on your homepage or a dedicated ‘Donate’ page.
The easiest way is to edit a page where you want the form to appear. Simply click the plus (+) icon to add a new block, search for the ‘Charitable Campaign’ block, and then select your campaign from the dropdown menu.
You can also find a unique shortcode for your campaign on the right-hand side of the campaign editor page, which you can paste anywhere on your site.
Optional: Display Multiple Campaigns in a Widget
If you plan on running multiple campaigns at once, then Charitable has a handy ‘Campaigns’ widget. You can add this to your sidebar or footer to link all your different donation forms together in one convenient place.
The widget automatically updates as you add or end campaigns.
The best part? No matter how you display your campaign, Charitable automatically styles it to match your WordPress theme, so you don’t need to worry about hiring a designer.
Method 2: Use WP Simple Pay for Dedicated Stripe Donation Forms
If you primarily use Stripe as your payment gateway and want a powerful, streamlined way to create donation forms, then WP Simple Pay is an excellent choice.
It’s the best option if you want to accept Stripe payments without the complexity of a full donor management platform like Charitable. You can learn about my experiences with the plugin in my detailed WP Simple Pay review.
But to use the specific donation features we cover here, like the pre-built donation template and the flexible amount options, you will need a paid version of WP Simple Pay. The Personal plan is the perfect starting point.
Step 1: Install and Activate WP Simple Pay
First, you will need to install and activate the WP Simple Pay plugin. Since it is a premium plugin, you will need to upload it from your account on their website. If you need help, you can follow our guide on how to install a WordPress plugin.
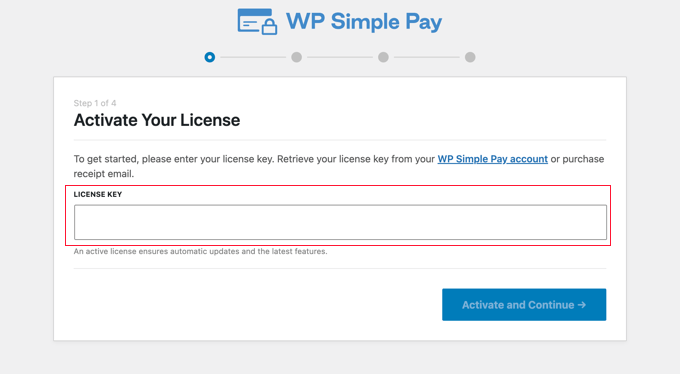
Once activated, the setup wizard will prompt you to enter your license key. You can find this in your WP Simple Pay account.
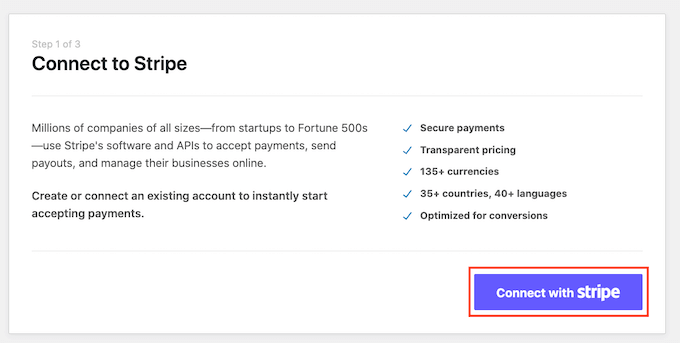
Step 2: Connect Your Stripe Account
The next step in the setup wizard is to connect your Stripe account.
Simply click the ‘Connect with Stripe’ button. This will take you to Stripe’s website, where you can log in to your existing account or create a new one.
The wizard will also help you configure the basic email settings.
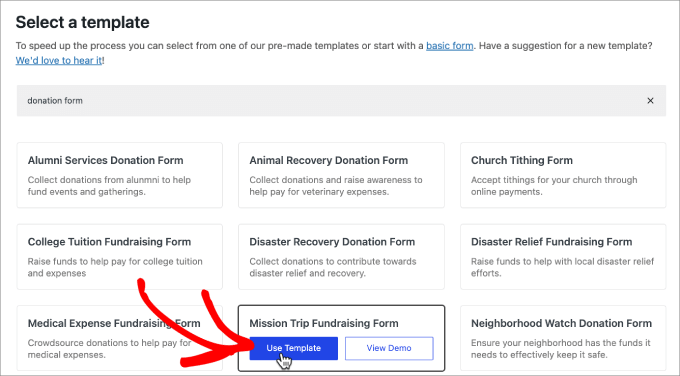
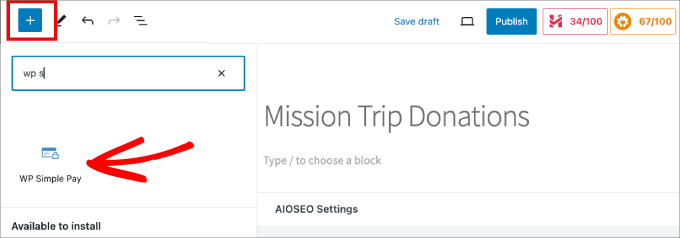
After connecting Stripe, you can create your form. Navigate to WP Simple Pay » Add New Payment Form from your WordPress dashboard.
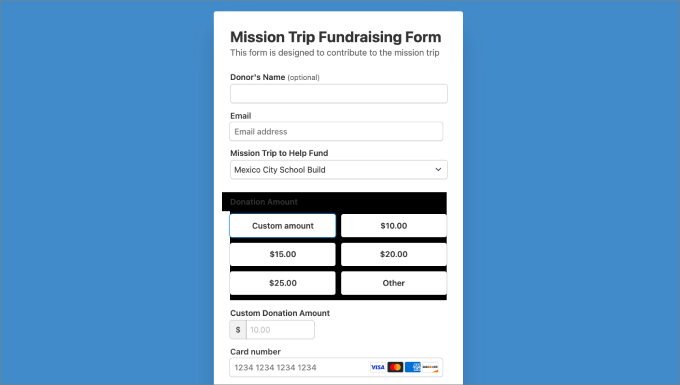
You’ll see a library of pre-built form templates. Simply find a ‘Donation Form’ template and click on it. In my example, I’m using the ‘Mission Trip Fundraising Form’.
Step 4: Customize Your Form and Currency
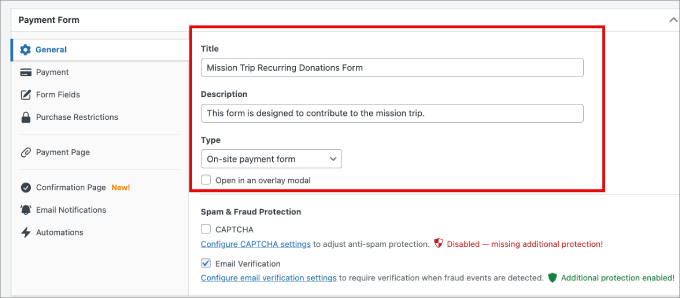
This will open the form builder.
On the ‘General’ tab, you can change the Title and Description of your form.
Next, click on the ‘Payment’ tab on the left. This is where you’ll set up all the important donation details.
The very first option is ‘Payment Mode.’ I highly recommend setting this to Test Mode to start. This is a super helpful feature that lets you submit the form with fake credit card details to make sure everything is working perfectly before you go live.
When you’re ready to accept real donations, just switch this back to Live Mode.
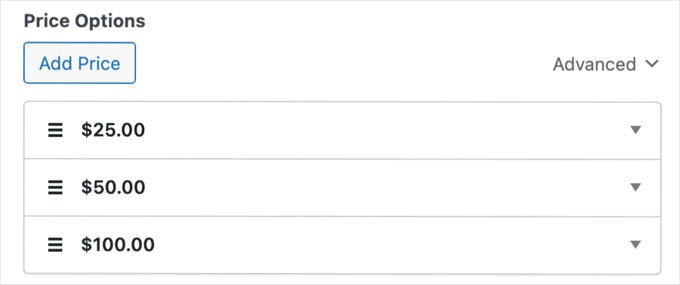
Now, let’s configure the donation amounts in the ‘Price Options’ section.
To offer donors a few preset options, click the ‘Add Price’ button for each new amount you want to add. For each price, you can set the currency, the amount, and choose whether it’s a one-time or recurring subscription payment.
For this example, I’ll add three one-time payment options: $25, $50, and $100.
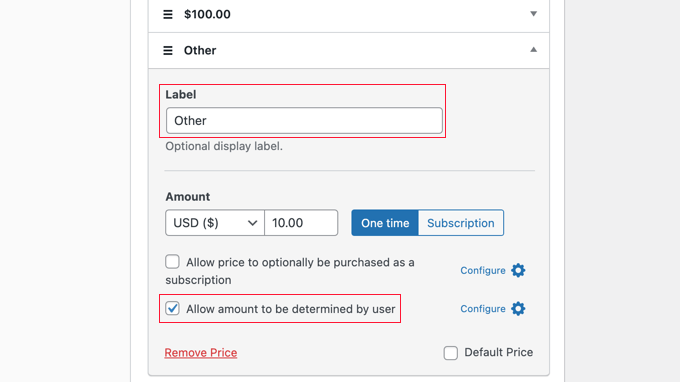
Finally, to give donors the freedom to contribute a different amount, simply add a fourth price. Then give the price a label like ‘Other’ and check the box that says ‘Allow amount to be determined by user’.
This will allow donors to enter their own custom amount.
This combination of settings is perfect for a donation form because it guides donors with suggested amounts while also providing flexibility.
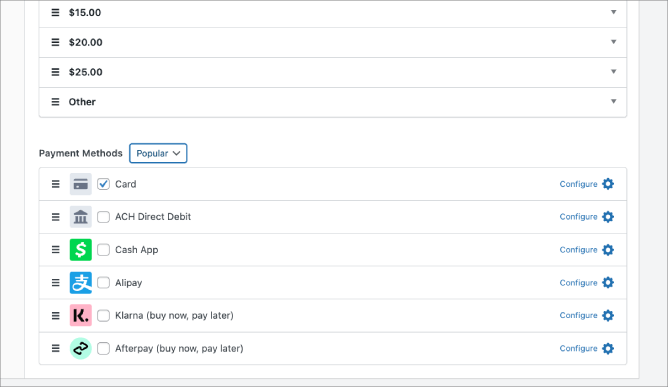
At the bottom of the page, you can select the payment methods you would like to accept.
Add all of the payment methods that your donors are likely to want to use. By offering their preferred method, you can improve your conversion rates.
You may also see a checkbox for ‘Tax Collection.’ For a standard donation form, you should leave this box unchecked.
In most countries, donations where the donor doesn’t receive any goods or services in return are considered gifts and are not subject to sales tax or VAT.
This setting is typically used only in complex situations, like selling tickets to a fundraising event where a product or service is provided in exchange for payment.
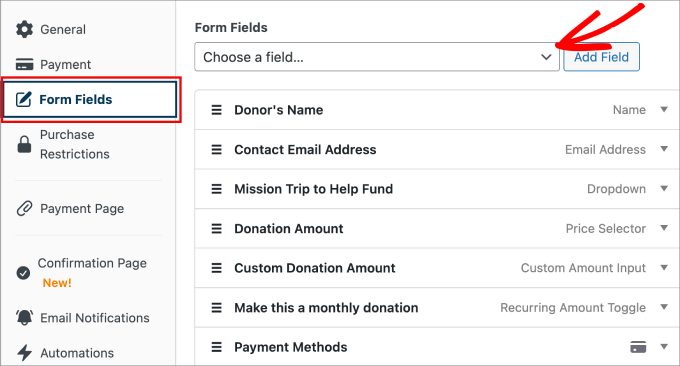
Now that your payment options are set, you can customize the information you collect from donors. The donation template already includes essential fields like ‘Name’ and ‘Email,’ but you may want to add more.
Click on the ‘Form Fields’ tab. Here, you can click ‘Add Field’ to include new fields from a dropdown list.
For instance, you might want to add a ‘Phone Number’ field to contact donors, or a ‘Billing Address’ field, which can be helpful for your records.
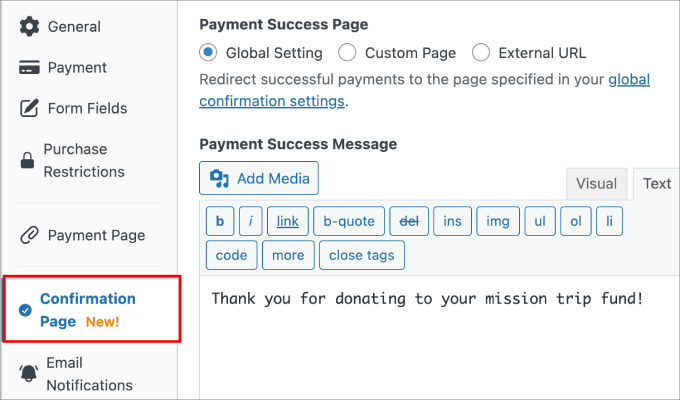
Finally, I recommend you set up a confirmation message. A thoughtful thank-you message is a great way to show your appreciation and confirm that the donation was successful. It gives donors confidence that their funds have been received.
Just go to the ‘Confirmation Page’ tab. Here, you can choose to display an on-page message. I recommend customizing the text to thank the donor personally and let them know a receipt is on its way.
Alternatively, you can choose the ‘Custom Page’ option to redirect the user to a dedicated Thank You page on your site. This is a great option if you want to include a video, share links to your social media, or tell the donor more about the impact of their gift.
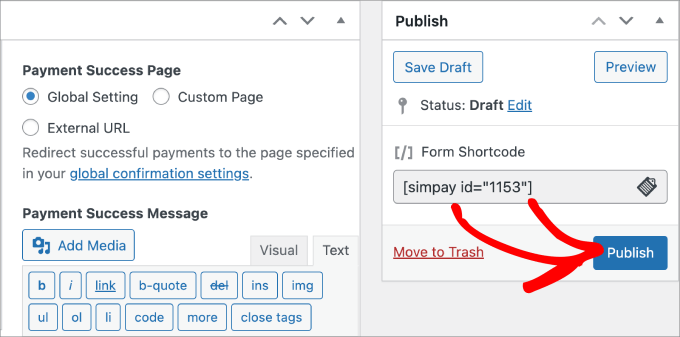
Once you are happy with the settings, click the ‘Publish’ button on the right side of the screen.
Step 5: Add the Form to Your Website
Your form is now ready to be added to your site. You can add it to any page or post. Simply edit the page where you want to display the donation form.
Click the plus (+) icon to add a new block and search for the ‘WP Simple Pay’ block. Select it to add it to your page.
Then, choose your newly created donation form from the dropdown menu. The form will automatically load in the editor.
Step 6: Test Your Donation Form
Before you start accepting real money, it’s essential to run a quick test to make sure everything is working correctly. Since your form is still in Test Mode, you can do this safely without any real transactions.
Visit the page where you just added your form on the front-end of your website. It should look something like this:
Now, fill out the form with some dummy information. For the credit card field, you can use one of Stripe’s official test card numbers.
Here are a few common ones:
Visa: 4242 4242 4242 4242
Mastercard: 5555 5555 5555 5555
You can use any future date for the expiry and any 3 digits for the CVC.
Click the ‘Donate’ button to submit the form. You should see the confirmation message you configured earlier. This means your form is working perfectly.
The final step is to go back to the form editor at WP Simple Pay » Payment Forms. Navigate to the ‘Payment’ tab, and switch the ‘Payment Mode’ back to Live Mode. Don’t forget to save your form again.
Frequently Asked Questions About Accepting International Donations in WordPress
When I help nonprofits set up global donations, a few questions always come up. To make things easier for you, I’ve put together answers to the most common ones right here.
This should help clear up any confusion about currencies, legal rules, and the best tools for the job.
What are the best payment gateways for international donors?
Stripe and PayPal are the most reliable payment gateways for international donations because they support the widest range of countries and currencies. Stripe operates in dozens of countries (nearly 50 at last count) and accepts more than 135 currencies, while PayPal is available in over 200 countries and markets worldwide.
How is currency conversion handled?
Your payment gateway (like Stripe or PayPal) automatically handles the currency conversion. This means that while your form might display donation amounts in USD, a donor from the UK can still pay using their GBP-based card.
The gateway processes the conversion during the transaction. You receive the funds in your currency, and the donor sees the charge in theirs. Keep in mind that conversion fees (usually 1-2%) may apply on top of standard processing fees.
Do I need to register my nonprofit in other countries?
The rules for accepting donations are different in every country. Some nations may require your nonprofit to register with them before you can ask their citizens for money. Because these rules can be complex, it’s always best to consult with a legal professional to ensure you’re following the correct procedures.
Which WordPress donation plugin is best for international giving?
Charitable is best for comprehensive fundraising campaigns with multiple payment gateway options (Stripe, PayPal, and more). On the other hand, WP Simple Pay is the perfect choice if you primarily use Stripe and want a simple, powerful tool dedicated to creating streamlined donation and payment forms.
Both handle international transactions well.
Can I show donation amounts in the visitor’s local currency?
The methods described in this guide use a single currency on the donation form (for example, USD). This is the simplest and clearest approach.
For a more advanced setup that automatically shows amounts in a visitor’s local currency, you would typically need a special multi-currency plugin or a premium addon for your forms plugin. For most nonprofits starting out, I recommend sticking with a single, clearly stated currency.
Can I issue tax-deductible receipts for international donations?
Your WordPress plugins can generate donation receipts automatically, but their validity for tax deductions varies by the donor’s country of residence. You should include a disclaimer on your receipts noting that tax deductibility depends on local laws, and donors should consult their tax advisors for specific guidance.
Next Steps to Grow Your Nonprofit Website
Setting up your WordPress site to accept international donations is achievable with the right tools. Whether you use a full campaign system like Charitable or a dedicated Stripe payment form from WP Simple Pay, you can connect your cause with worldwide supporters.
By opening your website to international payments, you can build a more reliable fundraising foundation and welcome a world of new donors.
Now that you can accept donations from around the world, here are a few more guides to help you improve your nonprofit website:
If you’re not playing music while you’re working, you’re missing out. It’s incredible how sounds can transform how our brain works. You can, on tap, put yourself into a different mode of being with music; you can change your drive, motivation, mood, and more. There are some apps that have started to hack this, such as Endel, which can generate music programmatically in a very Brian Eno-like way. I’ve been a fan and user of theirs since 2020. I also love the Lofi Girl. On your Sonos you can actually stream Focus @ Will, which is another attempt, and I have a subscription there. My favorite is Endel, though, so if you’re only going to try one, try that one.
I’m thrilled to be part of the line up for Web Directions Enqueue, co presented by The Code Company, on November 28, 2025. Enqueue is to be one of the first engineering focused WordPress conferences in Australia, and the line up includes some of the best engineering minds in WordPress today, including Jono Alderson, Tammie Lister, Isabel Brison, Cameron Jones and too many more to mention.
I’ll be doing a deep dive into the performance improvements WordPress Contributors have added to the Query classes in recent years.
The WordPress Performance team was established in 2021 with the goal of improving the performance of WordPress Core. As a fundamental part of rendering each and every page of a WordPress site, the WP_Query class has received a lot of attention.
In this talk, Peter will discuss how the performance of WP_Query and the WordPress Query component have been improved with increased caching, and how that can be taken full advantage of when building WordPress sites at scale.
There will also be talks about integrating WordPress with LLMs, accessibility and developer workflows.
Enqueue is taking place in Sydney on November 28, 2025 in the beautiful Dr Chau Chak Wing Building at UTS (the paper bag building). It will also be streamed via Conffab if you’re unable to make it in person.
When my father passed unexpectedly, I was despondent. One thing I remember was the Amazon lovebomb I got from my high school girlfriend Sunaina Sondhi, five books to help me deal with the pain. Even a decade after we dated, books were her love language; in fact, she had given me my very first book about meditation when we were teenagers. I don’t recall what all the books were, but the two that really made a difference for me were Elisabeth Kübler-Ross’s and David Kessler’s posthumous book On Grief and Grieving, and the Tibetan Book of Living and Dying. Each allowed me to process and understand the emotions I was going through.
MCP stands for Model Context Protocol. (The joke is the S in MCP stands for security, but that’s another post.) They say to think of it like “like a USB-C port for AI applications” because it allows interoperability between AI chatbots and other tools. Here’s some of the MCP stuff happening across the Automattic solar system:
Here’s how to set up Clay’s MCP so your AI can ask things like “Who are my contacts at Google that I haven’t spoken to in 6 months?”
Beeper’s MCP implementation lets you query your entire message history across iMessage (on MacOS), WhatsApp, Telegram, Signal, Instagram, and many more with natural language.
When nerds start connecting things, interesting stuff happens; that’s been my entire career, so while none of these have made it into a critical daily workflow for me, I’m curious to see what people come up with.
A month before Beta, is the time I get excited about a major release. Many new features—I see it all coming together via GitHub and Trac. The Source of Truth is in the works, but it will take a few more weeks to be published, as only when Release candidate 2 comes out I can be sure about what actually made it into the release.
Until then, check out Automattic Telex for your personal block-building needs. Below you learn from others who went before you.
If you are listening via Spotify, please leave a comment. If you listen via other podcast apps, please leave a review. It’ll help with the distribution.
Block-level commenting is Gutenberg Phase 3 feature and in very active development. Although still experimental, it is worth testing now, as it heads to WordPress 6.9.
Aki Hamano, core contributor to Gutenberg, has created the Block Commenting Data generator plugin to help him streamline his testing process for this feature. The plugin is available on GitHub, and it is not for use in a production environment. On activation it creates users, comments, and other data.
Gutenberg 21.7 Release candidate is now available for testing. It’ll be released on September 23, 2025. Block Commenting is a big part, as are DataForms improvements and write mode updates.
As a side note: You don’t have to wait for the next Gutenberg release to test things. You can use the Gutenberg Nightly with Playground
Now also available via WordPress Playground. There is no need for a test site locally or on a server. Have you been using it? Email me with your experience
Plugins, Themes, and Tools for #nocode site builders and owners
Check out Wes Theron’s latest video where he shows you how to build one-of-a-kind page layouts in WordPress. He dives into crafting a clean, distraction-free landing page, promoting a special event, and even how to give a specific page its own unique header and footer. Custom templates are totally where it’s at!
Justin Tadlock updated his Progress Bar Block plugin to v 2.0. It now supports Core features like drop shadow, blockGap and layout controls. It’s a feature-rich block that feels at home in the block editor, using the known interface components in the sidebar.
Dennis Buchwald, founder of the dbw-media agency in Germany, released his first plugin into the WordPress plugin directory, an infinite logo carousel block. You upload all the logos into the media library and into the block editor, and it displays a logo carousel with customizable speed, spacing, and hover-pause. A great way to display client, partner, or sponsor logos scrolling over your website. You can even control the overlay at the two sides. This one is a slight pink. It’s also on brand for dbw-media.
Welcome to the open-source community of WordPress plugin developers, Dennis Buchwald at dbw-media.de
Building blocks with Telex
Automattic Telex is like the next big thing in block building, all thanks to natural language! Just tell it what you’re dreaming up, and Telex will whip up the code, package it as a plugin, and you can test it out right away. It’s still experimental, but honestly, there’s no better time to start making your ideas into real WordPress blocks!
Not everyone who’s tried and shared their journey has hit the jackpot. Jamie Marsland totally had a blast, as he shared over on X (formerly Twitter)!
Jeff Paul also gave it whirl and shared his experience in Pong Block: A Fun New WordPress Plugin (and a Nod to Telex). He wrote, “That simplicity is why I’d recommend Telex to anyone curious about experimenting with block plugin creation. It feels like a fast way to explore an idea and get it live.” His plugin already landed in the WordPress repository, and you can add some playfulness to your site.
Marco Ivanovic, designer at Automattic, built a plugin called Space Dots with Telex. A fun block to display a bunch of moving dots that will react to your mouse movements.
Nick Hamze shared his Telex creations on X (formerly known as Twitter), like this flash card block. He also promised to submit his best 10 creations to the WordPress repository.
Theme Development for Full Site Editing and Blocks
Mary Ann Aschenbrenner,first-time speaker at WCUS 2025, was interviewed by Nathan Wrigley for the WPTavern podcast. #185 – Mary Ann Aschenbrenner on Switching Clients From Classic to Block Themes. They discussed the differences between classic and block themes, with Mary Ann offering practical advice for switching to modern block-based themes. She shared why to make the switch, potential challenges, and client conversion stories. Perfect for anyone wanting to understand how block themes make site building more accessible.
“Keeping up with Gutenberg – Index 2025” A chronological list of the WordPress Make Blog posts from various teams involved in Gutenberg development: Design, Theme Review Team, Core Editor, Core JS, Core CSS, Test, and Meta team from Jan. 2024 on. Updated by yours truly. The previous years are also available: 2020 | 2021 | 2022 | 2023 | 2024
Building Blocks and Tools for the Block editor.
Ryan Welcher has been on the quest to build the Core Icon block, inspired by Nick Diego’s Icon Block plugin and has been livestreaming his adventures with all kinds of tribulations. He dedicated two live stream sessions to this task.
Brian Coords, developer advocate with WooCommerce, asked, Are you down with MCP? because he initially didn’t get the hype—why waste AI tokens on simple tasks you could do faster manually? But after building a custom WordPress plugin for his wife’s bakery to track ingredient costs, he realized MCP’s power isn’t just data connection; it’s combining that with AI’s natural language interface to replace clunky forms with conversational commands.
This week, JuanMa Garrido tackled in his livestream REST API Authentication. Together with ChatGPT, he took a deep dive into WordPress REST API authentication methods, starting with the basics of how REST APIs work and setting up WordPress with proper permalinks. Then Garrido walked through WordPress’s core authentication systems, showing how cookie authentication works in the block editor by examining network requests and cookie headers. He explained WordPress’s built-in CSRF protection using nonces and demonstrated creating custom REST endpoints with permission callbacks. The tutorial also covers application passwords as an alternative to cookies, comparing them to JSON Web Tokens and discussing security considerations for token storage. Finally, Garrido explored more advanced topics like implementing JWT workflows with proxy servers and OAuth2 authentication for third-party apps.
Questions? Suggestions? Ideas? Don’t hesitate to send them via email or send me a message on WordPress Slack or Twitter @bph.
If you’ve ever spent time resending donation receipts, updating donor information, or fixing issues with recurring gifts, then you know how quickly these tasks can pile up for a nonprofit. Plus, it can be frustrating for your supporters who have to wait for updates or paperwork.
A donor portal can change all that.
With just a few clicks, donors can log in to view their giving history, download receipts, or update their personal information. This makes their experience smoother and gives you more time to focus on your mission.
The best part? If your site runs on WordPress, setting up a donor portal is simple. With a plugin like Charitable, you can add a secure donor dashboard in minutes – no coding required.
In this guide, I’ll show you how to create a donor portal for your nonprofit website so you can save time, build trust, and give supporters the simple self-service tools they expect.
Why Create a Donor Portal in WordPress?
A donor portal offers your supporters a secure, convenient space on your nonprofit website to manage their own donations – anytime they want.
Instead of reaching out for updates or paperwork, donors can simply log in to:
View their giving history and see the impact they’ve made.
Step 1: Install and Activate the Charitable Plugin
Before you can build a donor dashboard, you’ll need the right tool, and that’s where Charitable comes in.
Charitable is the best donation and fundraising plugin for WordPress. It comes with a built-in donor dashboard, which gives your supporters an easy, secure way to view their giving history, manage recurring donations, and update their information.
Our team has explored all of its features, and you can learn more about it in our Charitable review.
To get started, you’ll need a Charitable account. On the Charitable website, go ahead and click ‘Get Charitable Now.’
📝Note: Charitable has a free version for creating simple donation forms. However, to build the donor portal as shown in this guide, you will need at least the Basic plan that includes the Donor Dashboard feature.
After signing up, you’ll find the plugin’s zip file and license key in your Charitable account. Be sure to download the file, copy the key, and keep it somewhere safe.
The Charitable Pro plugin works as an extension of the free core plugin, so we’ll need to install that from your WordPress dashboard.
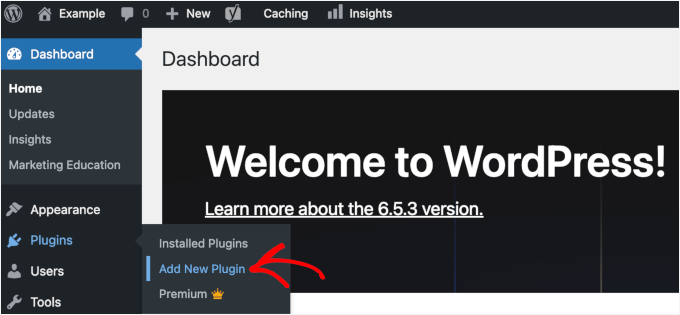
To do that, let’s head over to Plugins » Add NewPlugin.
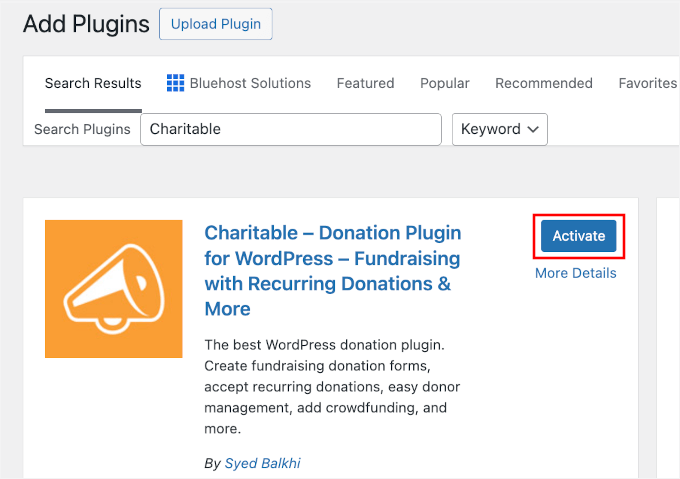
Then, go ahead and use the search bar to look for the Charitable plugin.
In the search result, simply click ‘Install Now’ and then ‘Activate.’
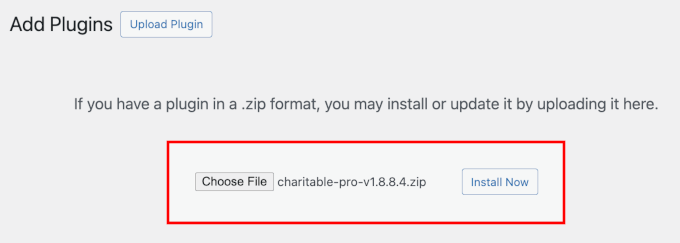
After activating the plugin, you’ll need to install your Charitable Pro version.
On this page, go ahead and click the ‘Upload Plugin’ button, select the zip file from your local computer, and click ‘Install Now.’
Then click the ‘Activate’ button when it appears. If you need help, then you can see our guide on how to install a WordPress plugin.
Now, you can enter your license key to unlock all the premium features that come with your chosen plan.
You can go to Charitable » Settings » License, paste it into the ‘License Key’ field, and click the ‘Verify Key’ button.
With that done, you’re ready to move on and start building your donor dashboard.
Step 2: Enable the Donor Dashboard in Charitable
Now that Charitable is set up on your WordPress website, it’s time to enable the built-in Donor Dashboard feature. This handy dashboard gives every donor a secure, private spot where they can check their donation history, update personal information, and manage any recurring gifts.
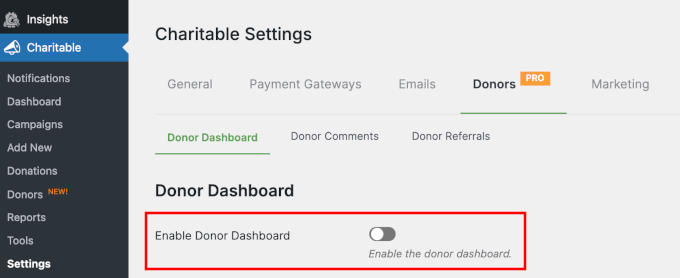
In your WordPress dashboard, navigate to Charitable » Settings » Donors and look for the option that says ‘Enable Donor Dashboard.’
Just toggle that switch, and your donors will now have access to their very own dashboard as soon as they sign up.
Step 3: Customize Your Charitable Donor Dashboard
Once you’ve enabled the Donor Dashboard, you’ll unlock a bunch of configuration options to show or hide fields from your donor portal.
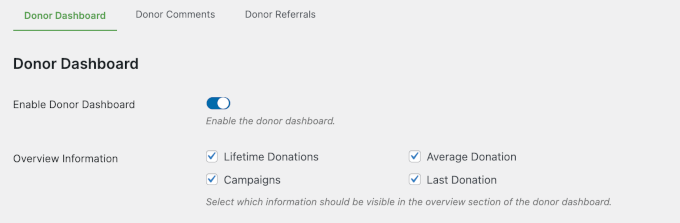
In the ‘Overview’ section, you can decide if you want to display:
Lifetime Donations: Shows the total amount a donor has given across all your campaigns. It’s a great way to highlight their overall impact.
Average Donation: Tells the donor how much they give, on average.
Campaigns: Lets them see how many different campaigns they’ve supported.
Last Donation: Displays when they last donated and how much.
Let’s say you want donors to see all their giving stats at a glance. You can simply check all these boxes so everything shows up in their dashboard.
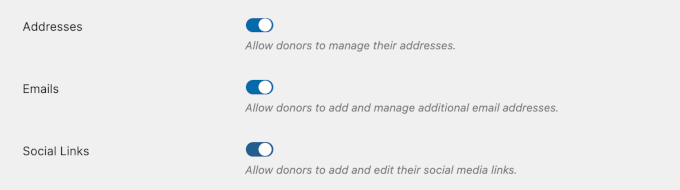
After that, you can decide whether donors can update contact and social details, like:
Postal or shipping address – Useful if you send thank-you letters or physical gifts.
Email address – Ensures that donors continue receiving updates and donation receipts.
Social links – Lets donors connect their social media profiles and share their support more easily.
You can enable any combination, but I recommend turning on all three to give donors more flexibility.
Next, you can choose exactly which tabs and information appear for your supporters.
Here are the main options:
Profile fields: Lets donors keep their information up-to-date, like their name, email, phone, birthday, avatar, and more.
Dashboard tab options: The ‘Campaigns’ tab shows campaigns that donors have created or supported. Whereas ‘Comments’ allows them to view comments they’ve left on your campaigns.
Here’s what it might look like with everything enabled:
Once you’re happy with your customizations, don’t forget to hit ‘Save Changes’ to lock in your donor dashboard settings.
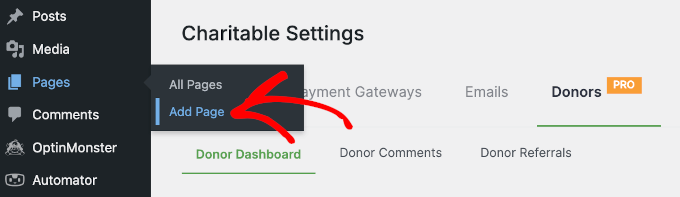
Step 4: Create a Donor Portal Page (Optional)
At this point, your donor dashboard page should be ready. This is because Charitable sets it up for you automatically.
But if you’d like to have a bit more control over how things look, it’s easy to set up your own custom page.
This optional step is great if you want to add a personalized welcome message, an image slider from your recent campaigns, or a special thank you video.
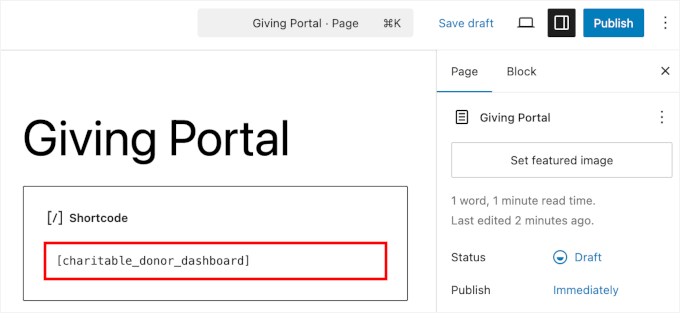
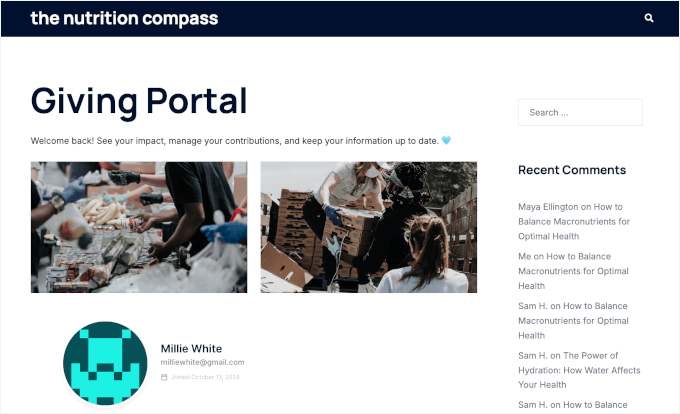
On the next screen, you can write the page title. Something like “Donor Dashboard,” “Giving Portal,” or “My Giving” works well.
Then, you can click the ‘+’ button to add the shortcode block. Simply use the search feature to quickly find it.
After that, simply add this shortcode to the page: [charitable_donor_dashboard].
🧑💻Pro Tip: Don’t worry if the shortcode doesn’t show up in the content editor – it will still work. Just use the ‘Preview’ feature to see how the page will look to your website visitors.
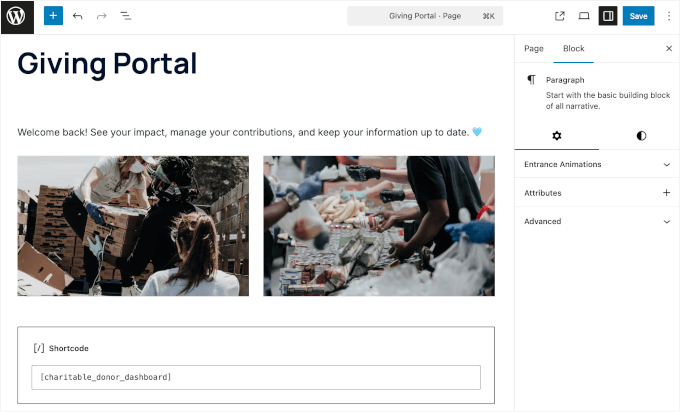
Once you’ve pasted in the shortcode, you can customize the page as you like.
For example, you could add a brief description to provide context. You might also want to add images, galleries, or carousels to showcase your nonprofit’s campaigns.
When you’re happy with how it looks, hit ‘Save’ or ‘Publish’ to make your new page live.
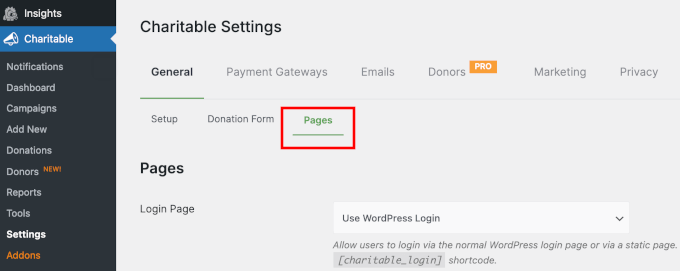
After publishing, there’s just one more quick step.
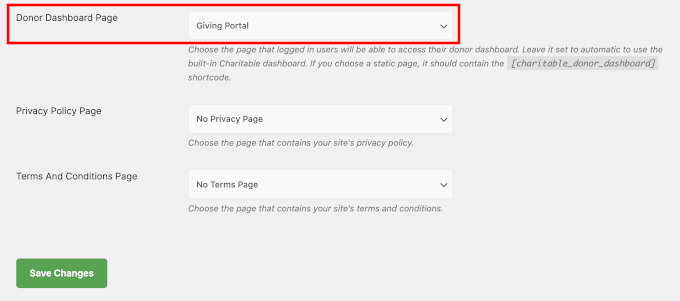
Let’s head back to Charitable » Settings » General » Pages to set your custom page to replace Charitable’s automatically generated donor page.
Here, you’ll want to scroll down the panel to the ‘Donor Dashboard Page’ section.
Simply use the dropdown menu to select the custom page you just created.
That’s it!
Now you have a dedicated donor portal on your nonprofit WordPress site. Your supporters can visit it any time to manage their giving.
Step 5: Preview the Dashboard as a Donor
Before you share your new donor dashboard with supporters, it’s always smart to test the portal yourself.
By logging in as a test donor, you can see exactly what your supporters will experience and make sure everything works smoothly.
Here’s what to check in your donor portal:
Overview: Confirm that total donations, average donation, supported campaigns, and last donation all display correctly.
Profile: Try updating contact details as a user would to make sure it’s quick and easy.
Donations: Make sure your donation history appears correctly and includes all details – amount, date, campaign, status, and action (like downloading the receipt).
Dashboard tabs: If you enabled ‘Campaigns’ and ‘Comments’ in Step 3, then you might want to check that the supported campaigns and any comments users left appear as expected.
Settings: Check that managing email consent and changing the password are straightforward.
You can just move through each menu using the navigation tabs under the ‘Overview’ section.
✋Disclaimer: The display might be different depending on your active WordPress theme. I used the Sydney theme on my test site, and the navigation uses the tab format, which I found very intuitive. But some themes use a dropdown instead.
This process gives you a chance to spot anything confusing and make improvements. That way, everyone’s experience is as smooth as possible from the very beginning.
Bonus Donation Form Best Practices to Boost Donations
Once your donor dashboard is set up, you’re already a step ahead in building trust with your supporters.
But if you’re hoping to boost your donations even more, it’s worth taking a closer look at your donation form itself. Here are some proven donation form best practices to help you grow your nonprofit:
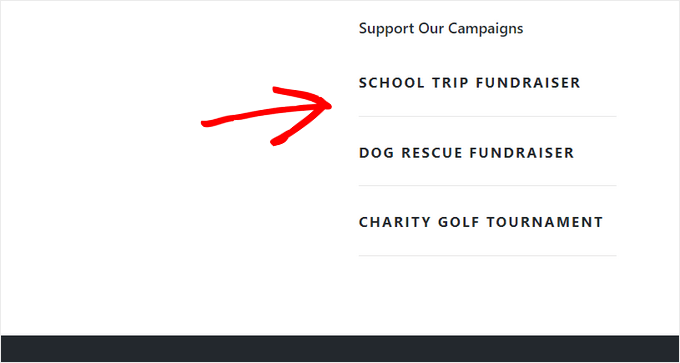
Make Your Donation Form Easy to Find: Place your donation button or link front and center. The key thing is not to make visitors hunt for it.
Explain the Impact: Tell supporters exactly how their gift will make a difference. A quick sentence or two about how donations help your cause goes a long way.
Offer Secure, Flexible Payment Methods: Be sure donors can give safely and use the payment options they trust most.
Set Preset Donation Amounts: Suggest a few different giving tiers or amounts to make choosing easier.
Make It Shareable: Let donors quickly share your donation form or campaign on social media to help spread the word.
Setting up a donor portal might seem overwhelming at first, but once you know the basics, it’s pretty straightforward.
Here are answers to some common questions:
How do I create a donation page in WordPress?
You can easily create a donation page by installing a WordPress donation plugin like Charitable. Once it’s set up, you can add a donation form to any page in just a few clicks.
Does Charitable include a donor portal?
Yes! Charitable comes with a built-in Donor Dashboard, making it easy to build your donor portal. When you enable this feature, donors get access to their own secure area where they can view their giving history, manage their information, and more.
Can donors manage their recurring donations?
Yes, they can! The Charitable Pro plans include a Recurring Donations addon. Once you enable it, supporters can easily manage, update, or cancel their recurring donations right from their personal dashboard.
Do donors automatically get an account?
It depends on the donation plugin you use. Charitable, for example, gives donors the option to create one either while making a donation or afterward. You can encourage them to sign up by including a link in your donation confirmation email or thank-you page.
Does Charitable allow donors to download receipts for taxes?
The Charitable plugin automatically generates PDF receipts for each donation. Donors can log in, view their donation history, and download receipts for their records or for tax purposes at any time.
Do I still need to email receipts manually?
Nope, if you use Charitable, as it handles this for you. Receipts are automatically sent to donors by email and are always available for download in their dashboard.
What if I want a member portal instead of a donor portal?
If you need a member portal with things like membership levels, exclusive content, or new member registrations, you might need a dedicated membership plugin instead. Some organizations decide to use both a donor portal for giving and a separate member portal for managing memberships.
Keep Exploring: How to Grow Your Nonprofit WordPress Website
I hope this guide has helped you build a donor portal for your nonprofit WordPress website.
If you found this helpful, then you might want to check out our other guides on:
In 2025, agentic AI revolutionizes WordPress, enabling context-aware automation and seamless integration across tools, enhancing workflows and empowering users without deep technical knowledge.


 The latest episode is